How to schedule a blog post on Shopify?
Blogging is an essential part of a successful Shopify business. It helps drive traffic, build customer relationships, and improve SEO. A well-timed posting schedule can help keep your audience engaged, increase return visits, and improve search engine rankings.
By consistently publishing fresh content, you build credibility with your readers and enhance your website’s SEO, making it easier for potential customers to find you. With ContentStudio, scheduling and posting blog posts to your Shopify account becomes quick and easy.
Let’s explore how you can connect your Shopify account with ContentStudio and schedule blog posts to maximize the potential of your online business.
Experience organized workflow with a unified social media management platform for agencies.
Try ContentStudio for FREE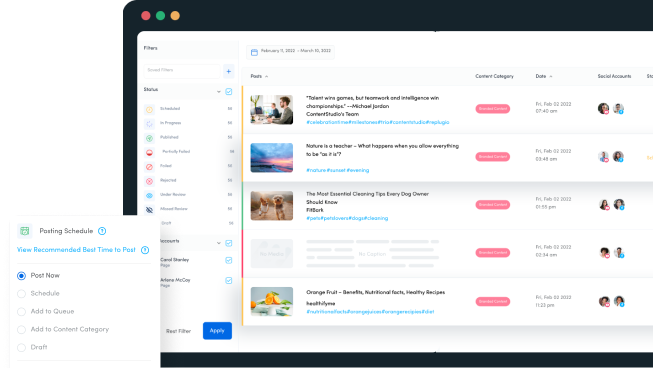
How to connect Shopify with ContentStudio?
Follow these steps to integrate your Shopify account with ContentStudio and streamline your blog scheduling:
- Open Shopify and log in to your account.
- Once logged in, navigate to the Apps section from your Shopify dashboard and click on Create App.
- Provide an app name (e.g., ContentStudio) in the relevant field and click Create.
- After creating the app, a configuration page will appear. Enter the following:
- App URL field: https://app.contentstudio.io/.
- Allowed redirection URL(s): https://apiprod.contentstudio.io/shopify/connect.
- Once entered, click on the Save button to apply the settings.
- Now, navigate to the Overview section of your Shopify app and click the Choose Distribution button.
- A popup will appear, prompting you to add your Shopify store domain. Enter your store’s domain (ensure it’s accurate, as it can’t be changed later), then click on Generate a link.
- Copy the generated link and open it in a new tab to redirect to ContentStudio.
- Login to your ContentStudio account and open Blogs / Websites.
- Click on Connect a new Shopify store button.
- Copy your Client ID and Client Secret key from Shopify’s Overview section.
- In ContentStudio, paste the Client ID and Client Secret, enter your Shopify store name, and then click Connect.
- Click on the Install app to complete the integration process.
- Your connected blog will now show up under the Shopify connected accounts.
By following these steps, you will be able to successfully connect your Shopify account with ContentStudio and start posting or scheduling content.
How to schedule blog posts on Shopify using ContentStudio?
Follow these steps to easily schedule your Shopify blog posts using ContentStudio:
Step 1: Open the blog composer
Once your Shopify account is connected, open the blog composer. You can access it by clicking on the Compose option in the navigation bar and selecting Blog Post.
Step 2: Write and optimize your content
- In the blog composer, you can either write manually or use the AI writing assistant to help craft your blog post.
- Make sure to optimize the content by including relevant keywords for SEO, adding internal and external links, and formatting the text properly.
- Don’t forget to upload a featured image that represents your blog post and aligns with Shopify’s blog display format.
Step 3: Schedule your blog post on Shopify
- After your content is ready, head to the Primary Channel section. From the dropdown, select Shopify as the primary platform where the blog post will be published.
- If you want to publish the same blog post on other platforms, such as Medium, Webflow, or WordPress, you can add them as secondary channels. Similarly, you can share the content on your social media channels as well.
- Finally, select the date and time at which you want to post the blog post on your Shopify account.
Once you’ve finalized your settings, hit Great, Publish This! button and your blog post will be queued to go live at the specified time on your Shopify store.
Benefits of using ContentStudio to schedule Shopify blogs
While Shopify offers a built-in blogging feature, its native interface has limitations regarding advanced scheduling and content management. ContentStudio offers several key advantages over Shopify’s basic blogging tool:
- Advanced scheduling: ContentStudio allows you to schedule blog posts well in advance, giving you more control over timing and frequency.
- Cross-platform integration: You can manage your Shopify blog and social media posts in one place.
- Collaboration tools: If you work with a team, ContentStudio offers collaboration features that let you review, approve, and assign tasks before a post goes live.
Using ContentStudio, Shopify merchants can simplify content creation, maintain a consistent blog schedule, and enhance overall engagement with minimal effort.
Related Read: Social media engagement: 10 easy ways to improve it
Bonus tips for optimizing blog posts on Shopify
To maximize the impact of your Shopify blog posts, it’s crucial to focus on optimization techniques that can enhance visibility, engagement, and conversion.
Here are some actionable tips:
- Integrate keywords: Use relevant keywords throughout your blog post, including in the title, headings, and body text. Ensure the content stays reader-friendly.
- Optimize meta tags: Create an SEO-optimized meta title and meta description that accurately describes your blog post while enticing readers to click.
- Use proper headings: Structure your content with H1, H2, and H3 headings to enhance readability and signal to search engines what the post is about.
- Internal linking: Link to related products or blog posts within your Shopify store to keep visitors engaged and improve SEO.
- Leverage Shopify SEO features: Use Shopify’s built-in SEO features, such as customizable URLs, alt-text for images, and automatic sitemap generation, for better search engine visibility.
- Mobile optimization: Ensure your blog posts are mobile-friendly. Shopify’s responsive design helps with user experience and SEO rankings.
- Monitor performance: Use Shopify’s analytics to track blog performance and adjust your strategy based on what works best for your target audience.
Conclusion
Scheduling blog posts on Shopify using ContentStudio is a powerful way to maintain a consistent posting schedule, boost engagement, and free up time to focus on other areas of your business.
By leveraging ContentStudio’s advanced features, you can optimize your blog content for SEO, schedule posts across multiple platforms, and ensure your content is published at the best time for your audience. This integration allows you to streamline your content workflow and keep your Shopify blog running smoothly without constant manual intervention.
FAQs
Can I edit a scheduled blog post in ContentStudio after scheduling it?
Yes, you can easily edit a scheduled blog post before it goes live. Simply navigate to your scheduled posts in ContentStudio, make the necessary changes, and reschedule if needed.
Can I schedule a Shopify blog post to publish on multiple platforms at the same time?
Absolutely! ContentStudio allows you to select Shopify as the primary channel and add secondary platforms, such as WordPress or Medium, to schedule your content across multiple platforms simultaneously.
How far in advance can I schedule Shopify blog posts using ContentStudio?
You can schedule your blog posts as far in advance as you like. ContentStudio offers flexibility in setting your publishing date and time-based on your content calendar.
Will my blog post be mobile-optimized when scheduled through ContentStudio?
Yes, Shopify automatically ensures your blog posts are mobile-responsive, and ContentStudio helps ensure all necessary optimizations are in place before publishing.
Subscribe to our weekly newsletter!
Join over 14,500+ agencies and brands to stay informed with weekly social media updates, blogs, strategies, and expert tips right into your inbox!
Recommended for you
